IO644 - Setup v2
IO644 - Setup v2 — Configure the IO644 I/O
module
Library
Simulink Real-Time - Speedgoat
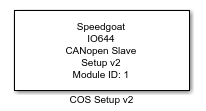
Description
The Setup block configures the protocol stack of the IO644 module and enables the
PDO and Object blocks to exchange data on the network. The old IO644 Send and
Receive blocks do not work with this Setup block version. With the Setup block, you
make the basic communication settings, define the device identity and configure the
network monitoring. During model start, the block adds the corresponding objects to
the device's object dictionary, which the remote master node can read and write
afterward.
You can use the IO644 module for both prototyping and simulation. For prototyping,
you design your own CANopen slave node in Simulink with a custom object dictionary
and export an EDS file (Electronic Data Sheet) with which you can register the
device in the master configuration tools. For simulation, you set the parameters
according to the EDS file of the device you want to simulate. This results in an
object dictionary that matches an object dictionary of the external device.
![[Tip]](images/tip.png) | Tip |
|---|
With the help of the createFromEds function, you
can import EDS files and autogenerate a communication interface in Simulink
ready for use with the IO644. According to the objects defined in the EDS file,
the function places the IO644 Setup, PDO, and Object driver blocks into the
model and automatically sets the block parameters according to the objects' data
types and values. |
Ports
This driver block has no input or output ports.
Parameters
General
- Module ID
The Module ID has two functions:
It logically connects the Setup block and its I/O blocks
It also informs the auto-search feature of the PCI Slot parameter. If only
one I/O module of this family is installed, the Module ID must be set to
1. To see how each I/O module maps to a
Module ID, use this Speedgoat API:
speedgoat.getIoInterfaces("TargetName", "mySpeedgoat")
This Setup block belongs to two families of I/O modules that use the same hardware
for multiple protocols. Across both families, the Module ID must be unique.
IO64X/IO75X (single-node modules): IO641,
IO642, IO643, IO644, IO750, IO751, IO752, IO753, IO754, IO755, IO756,
IO758
IO64X-32/IO75X-32 (multi-node modules):
IO642-32, IO752-32, IO754-32, IO756-32
If the PCI Slot parameter is set to -1
(auto-search), the Module ID must be in the range 1:n, where 'n' cannot be larger
than the number of modules of this type installed in the target machine. Not all
installed I/O modules need to be used.
To use this Setup block with a multi-node I/O module (IO75X-32 family), the Module
ID must be defined as a two-element vector. The second vector element is the
sub-module ID. It describes the specific node (1:32) within the I/O module. The 32
nodes are internally connected to form two linear networks (daisy-chain), where the
first and the last node of both chains are externally accessible. If one node is not
configured (has no Setup block), the chain terminates at this point. The sub-module
IDs must therefore start at node 1, 16, 17 or 32 and not have any gaps.
![[Note]](images/note.png) | Note |
|---|
When using I/O modules of both families simultaneously (single-node and
multi-node I/O modules), always use explicit addressing in the PCI Slot parameter. Ignore the Module IDs returned by
the getIoInterfaces function and instead assign unique Module IDs accross all
modules used. |
-
PCI Slot (-1: auto-search)
There are two approaches for mapping this block to a specific I/O module installed
in your target machine. All modules of the same type must be configured using the
same method.
Auto-Search: with the default value -1 the I/O module will be automatically located in the
target machine. If you have multiple modules of the same kind, the
Module ID defines which module is associated with this block. To see how
each I/O module maps to a Module ID, use this Speedgoat API:
speedgoat.getIoInterfaces("TargetName", "mySpeedgoat")
Explicit Addressing: to explicitly define the logical address of the
I/O module in the target machine, you can provide the PCI bus and slot
numbers as a vector: [bus, slot]. To determine these numbers, run the
following command in the MATLAB command window:
speedgoat.getIoInterfaces("TargetName", "mySpeedgoat", "Advanced", true)Note
that the PCI address can change whenever an I/O module is added or
removed – usually, auto-search is the best option.
-
CAN Node ID
The address of the module in the CANopen network. Each node has a
unique address between 1 and 127. The value must match the address of
the related node in the network configuration of the master.
Data Type:
numeric scalar
-
Baud Rate
Select the transmission speed. The speed must match the speed selected
in the master configuration. The values in the dropdown list are
defined by the CANopen standard. The options a CANopen device supports
are listed in the DeviceInfo section of the corresponding EDS file. The
IO644 supports all options specified by the standard. Therefore, all
baudrates are marked as supported in the EDS file. Select Auto if you are not sure which baud rate to
select. Refer to the manual of your CANopen master to learn about how to
set the CANopen timing on the master side.
- Export EDS File
Creates an EDS file according to the IO644 blocks used in the model
and their parameter settings. You can change the entries in the FileInfo
section afterward (FileName, FileVersion, etc.). Only blocks with the
same Module ID are taken into
account.
Device Info
- Device Type
The Device Type is a combination of the CANopen profile the device
complies with and the device type ID. The value must range
between 0 and 0xFFFFFFFF. You can enter the type of the device you want
to simulate according to its EDS file or leave the default value 0. A
value of 0x00020192, for example, represents the servo drive device type
(0x02 = 2) of the CiA device profile for drives and motion control
(0x0192 = 402). Checking the device type is part of the identity check
(optional) that the master performs when connecting to slave nodes. The
device type is represented by object 0x1000.
Data Type:
numeric scalar
- Vendor Name
The name of the vendor of the CANopen device. You can enter the vendor
of the device you want to simulate according to its EDS file or leave
the default value Speedgoat. The vendor name is represented by the
VendorName entry in the DeviceInfo section of the EDS file.
Data Type:
character array
- Vendor ID
The ID of the vendor of the CANopen device in the range 0 to
0xFFFFFFFF. You can enter the ID of the device you want to simulate
according to its EDS file or leave the default value 0x00000267
(Speedgoat GmbH). Checking the vendor ID is part of the identity check
(optional) that the master performs when connecting to slave nodes. The
vendor ID is represented by object 0x1800, sub-object 0x01, and by the
VendorName entry in the DeviceInfo section of the EDS file.
Data Type:
numeric scalar
- Product Name
The name of the CANopen device. You can enter the name of the device
you want to simulate according to its EDS file or leave the default
value IO644. The product name is represented by the ProductName entry in
the DeviceInfo section of the EDS file.
Data Type:
character array
- Product Code
The product code of the CANopen device in the range 0 to 0xFFFFFFFF.
You can enter the number of the device you want to simulate according to
its EDS file or leave the default value 1 (IO644). Checking the product
code is part of the identity check (optional) the master performs when
connecting to slave nodes. The product code is represented by object
0x1800, sub-object 0x02, and by the ProductNumber entry in the
DeviceInfo section of the EDS file.
Data Type:
numeric scalar
- Revision Number
The revision of the CANopen device in the range 0 to 0xFFFFFFFF. You
can enter the revision of the device you want to simulate according to
its EDS file or leave the default value 1. Checking the revision number
is part of the identity check (optional) the master performs when
connecting to slave nodes. The revision is represented by object 0x1800,
sub-object 0x03, and by the RevisionNumber entry in the DeviceInfo
section of the EDS file.
Data Type:
numeric scalar
Monitoring
Using the Heartbeat and Node Guarding error control protocols, a CANopen node
can check whether other nodes in the network are still alive. Examples:
The master monitors one or multiple slave nodes
A slave node monitors the master
A slave node monitors other slave nodes
The two protocols are not used simultaneously.
- Heartbeat
Each node can act as a heartbeat producer, cyclically sending
heartbeat messages. All other nodes can act as consumers, monitoring the
producer's heartbeat message. In a typical application, each slave
monitors the master and the master monitors all slaves.
- Producer Time
The interval in milliseconds at which the module should
send out heartbeat messages. The maximum value is 65535 ms.
A value of 0 turns off heartbeat messages.
The value is represented by object 0x1017. The master can
change the value via the SDO protocol and can therefore
prompt the slave to produce or stop producing
heartbeats.
Data Type:
numeric scalar
- Consumer Time
The timeout for monitoring the heartbeat messages of
remote nodes. The timeout defines the time the module should
wait before indicating a specific node's loss. The Network
Status block outputs this information. The parameter is an
n-by-2 matrix with up to 64 rows representing 64 devices.
The first column defines the node ID to be monitored. The
second column defines the respective timeout. The maximum
timeout is 65535 ms. If the node ID is not 0, the timeout
must not be 0.
Each monitored node is represented by a sub-object of
object 0x1016. The sub-object's value includes the node ID
and the corresponding timeout. The master can change the
values via the SDO protocol and can therefore prompt the
module to monitor or stop monitoring other nodes.
Data Type:
numeric matrix
- Node Guarding
The master cyclically sends polling messages to the slave nodes to
check whether the nodes still exist. The slave nodes return their current
state in response to the master (Node Guarding). The nodes use the poll
messages of the master to supervise the master (Life Guarding).
- Guard Time
Defines the interval in milliseconds at which the master
should send polling messages. A value of 0 turns off node
and life guarding in the local slave node and the remote
master.
The value is represented by object 0x100C. The master can
change the value via the SDO protocol and can therefore
enable or disable the guarding protocol.
Data Type:
numeric scalar
- Life Time Factor
The life time is defined as Guard
Time multiplied by Life
Time Factor. If the module does not receive
polling messages within the life time, it generates a
life guarding event in the Network Status block. The maximum
life time factor is 255. A value of 0 disables node and life
guarding in the module and the remote master.
The Life Time Factor is represented by object 0x100D. The
master can change the value via the SDO protocol and can
therefore enable or disable the guarding protocol. To
achieve stable communication, the Life Time Factor must be
set to at least 2. Life guarding can only be used if the
master carries out node guarding.
Data Type:
numeric scalar